UPDATE (2012): Events Calendar Pro is out and the community events plugin is on it’s way. To make the below method work with Events Calendar Pro 2.0 or above you’ll need to use this code in your functions file:
add_action('save_post', 'save_tec_event_meta_from_gravity', 11, 2);
    function save_tec_event_meta_from_gravity($postId, $post) {
        if( class_exists('TribeEvents') ) {
            // only continue if it's an event post
            if ( $post->post_type != TribeEvents::POSTTYPE || defined('DOING_AJAX') ) {
                return;
            }
            // don't do anything on autosave or auto-draft either or massupdates
            if ( wp_is_post_autosave( $postId ) || $post->post_status  'auto-draft' || isset($_GET['bulk_edit']) || $_REQUEST['action']  'inline-save' ) {
                return;
            }
            if( class_exists('TribeEventsAPI') ) {
                TribeEventsAPI::saveEventMeta($postId, $_POST, $post);
            }
        }
    }
This tutorial demonstrates how to use Gravity Forms to submit events to Events Calendar Pro from the public facing side of a WordPress theme.

First you’ll need the Gravity Forms plugin and the Events Calendar Pro plugin installed. These are both premium plugins and well worth the price. You should also install the Gravity Forms + Custom Post Types plugin to connect Gravity Forms submissions with Events.
Now that you have the above 3 plugins installed you should create a new Form.
- In the admin panel click on Forms > New Form
- Title this form and under Form Settings > Advanced change the button text to something like “Submit Event”
- Use the Post Fields panel to add Title and Body fields to the form.
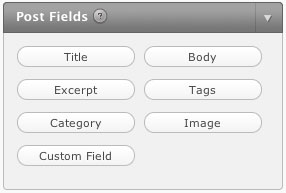
- Under the Title field you have created go to Advanced and check the “Save As Custom Post Type” box (this was added by the Gravity Forms + Custom Post Types plugin) and choose Events from the drop-down list.
- Use the Advanced Fields panel to add 1 Date and 2 Time fields (for start and end time)
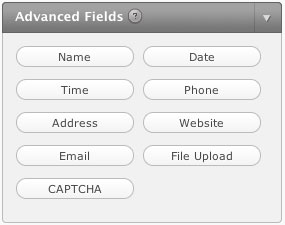
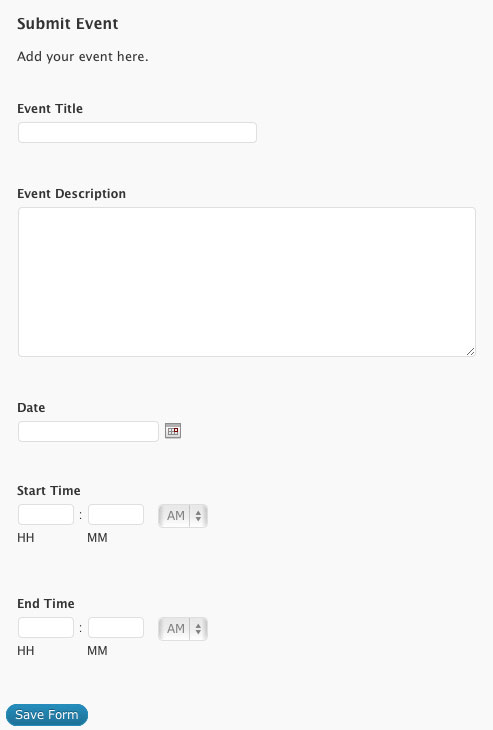
It’s important to create the fields in this order to match the functions we will be adding later in this tutorial. The Date should be the 3rd field, the Start Time the 4th field and the End Time the 5th field.
Your form should now look like this:
Now you can add extra fields to be used by Events Calendar Pro. Available fields:
_EventVenue, _EventPhone, _EventAllDay, _EventCost, _EventAddress, _EventCity, _EventZip, _EventState (use format like AZ), _EventCountry (use format like United States), _EventOrganizerID, _EventVenueID, _EventAllDay, _EventStartDate, _EventEndDate, _EventShowMapLink, _EventShowMap
The Venue Custom Post type uses: _VenueVenue, _VenueCountry, _VenueAddress, _VenueCity, _VenueStateProvince, _VenueZip, _VenuePhone
The Organizer Custom Post type uses: _OrganizerOrganizer, _OrganizerEmail, _OrganizerWebsite, _OrganizerPhone
For example here is how you would add an Event Venue to the form:
- Under the Post Fields panel choose Custom Field
- Edit this custom field and label it something like Event Venue
- Under “Custom Field Name” choose New and enter _EventVenue
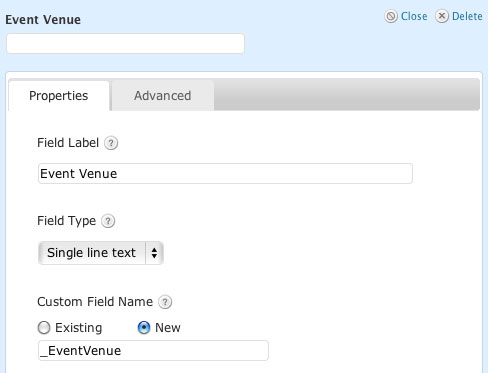
- You can add more custom fields as needed
You should now save the form and go to Forms > Edit Forms to see a list of the Gravity Forms you’ve created. Be sure to note the Id of this Submit Event form. If this is the first form you’ve created the Id will be “1”.
Next you need to add some code to the functions.php for of the active theme. (Special thanks to Sam DeVore for this code!)
// Format Date from gravity forms to events plugin
add_action("gform_pre_submission", "format_event_date");

function format_event_date($form){
    $formId = 1;  // this is the gravity forms id
    $dateFormId = 3; // this is the form element that contains the date  of the form 'mm/dd/yyyy'  $_POST['input_3']
    $startTimeFormId = 4; // form element for the start time  $_POST['input_4'][0] - for hour, $_POST['input_4'][1] - for minute, $_POST['input_4'][2] - for meridian
    $endTimeFormId = 5; // form element for the start time  $_POST['input_5'][0] - for hour, $_POST['input_5'][1] - for minute, $_POST['input_5'][2] - for meridian

    if($form["id"] != $formId){
        return;
    }
    $date = date_parse($_POST['input_'. $dateFormId]); // break the date into an array

    // sql format the result
    $dateString = $date['year'] . '-' . str_pad($date['month'], 2, "0", STR_PAD_LEFT) . '-' . str_pad($date['day'], 2, "0", STR_PAD_LEFT);

    // get the start/end times
    $startTime = $_POST['input_'. $startTimeFormId];
    $endTime = $_POST['input_'. $endTimeFormId];

    // load the values for EventsCalendarPro
    $_POST['EventStartDate'] = $dateString;
    $_POST['EventStartHour'] = str_pad($startTime[0], 2, "0", STR_PAD_LEFT);
    $_POST['EventStartMinute'] = str_pad($startTime[1], 2, "0", STR_PAD_LEFT);
    $_POST['EventStartMeridian'] = $startTime[2];

    $_POST['EventEndDate'] = $dateString;
    $_POST['EventEndHour'] = str_pad($endTime[0], 2, "0", STR_PAD_LEFT);
    $_POST['EventEndMinute'] = str_pad($endTime[1], 2, "0", STR_PAD_LEFT);
    $_POST['EventEndMeridian'] = $endTime[2];
 }
Important Notes:
- Make sure to put the above function code inside php tags.
- $formId = 1 needs to match your forms Id #
- $dateFormId = 3 needs to match the Date form ID. It will be 3 if you followed the instructions above. Alternatively you may need to find this by Viewing Source on the form page.
- $startTimeFormId = 4 needs to match the Start Time form ID.
- $endTimeFormId = 5 needs to match the End Time form ID.
The last step is to add this new Gravity Form to the page where you’d like visitors to submit events. By default events will be submitted as Drafts and may be approved and edited by an admin.
Visitors to your site may now submit events which will be added to Events Calendar Pro and may be easily published to your Calendar.